AWS 클라우드환경 네이티브 수업 117 일차
진행
1. contestPath + JSTL (c.set) 사용법
2. root-context.xml
3. 도서 쇼핑몰 만들기 (footer / top menu / main view)
요약
1. contestPath + JSTL (c.set) 사용법
2. root-context.xml
3. 도서 쇼핑몰 만들기 (footer / top menu / main view)
4. resources mapping
contestPath
WAS에서 웹 애플리케이션을 구분하기 위한 경로
프로젝트를 생성하면 자동으로 server.xml에 추가되어 서버 구동 시 자동으로 잡히는 경로
<c:set var="contextPath" value="${pageContext.request.contextPath}"/>
= 현재 url경로(프로젝트 경로)
<c:set>
EL에서 사용되어질 수 있는 Bean, Map등에 값을 설정을 하거나, 일반 변수를 생성해서 값을 할당 할 수 있습니다.
이 태그로 미리 세팅을 해두면, 정해진 var 변수를 불러 올 시 들어 있는 값을 가져올 수 있다.
(변수 같은 것이다)
<c:set> 태그의 속성들
- var 속성 : 값이 저장되는 변수명.
- value 속성 : 값을 입력. EL을 사용할 수 있다.
- target 속성 : 프로퍼티를 설정할 빈 또는 맵을 가짐.
- property 속성 : 설정할 프로퍼티.
- scope 속성 : 변수가 저장된 Scope . page, request, session, application 을 가질 수 있고, 기본값은 page.
root-context.xml 설정

위의 위치에 jdbc.properties 파일을 만든다.
# jdbc.properties


# DataSource
# MYsql 사용할때
# jdbc.driverClassName=com.mysql.cj.jdbc.Driver
jdbc.driverClassName=net.sf.log4jdbc.sql.jdbcapi.DriverSpy
jdbc.url=jdbc:log4jdbc:mysql://localhost:3306/gils?useSSL=false&serverTimezone=Asia/Seoul
jdbc.username=awsuser
jdbc.password=1111

# Oracle 사용할때, XE = 오라클 버전, ORA ORCL 등이 있음 SID: XE, ORA, ORCL
#jdbc.driverClassName=net.sf.log4jdbc.sql.jdbcapi.DriverSpy
#jdbc.url=jdbc:log4jdbc:oracle:thin:@localhost:1521:XE (or ORA ORCL)
#jdbc.username=scott (유저이름)
#jdbc.password=tiger (유저 비밀번호)
<!-- root-context2.xml -->

<?xml version="1.0" encoding="UTF-8"?>
<beans xmlns="http://www.springframework.org/schema/beans"
   xmlns:xsi="http://www.w3.org/2001/XMLSchema-instance"
   xmlns:aop="http://www.springframework.org/schema/aop"
   xmlns:context="http://www.springframework.org/schema/context"
   xmlns:jdbc="http://www.springframework.org/schema/jdbc"
   xmlns:mybatis-spring="http://mybatis.org/schema/mybatis-spring"
   xsi:schemaLocation="http://www.springframework.org/schema/jdbc http://www.springframework.org/schema/jdbc/spring-jdbc-4.3.xsd
      http://mybatis.org/schema/mybatis-spring http://mybatis.org/schema/mybatis-spring-1.2.xsd
      http://www.springframework.org/schema/beans https://www.springframework.org/schema/beans/spring-beans.xsd
      http://www.springframework.org/schema/context http://www.springframework.org/schema/context/spring-context-4.3.xsd
      http://www.springframework.org/schema/aop http://www.springframework.org/schema/aop/spring-aop-4.3.xsd">

	<!-- Root Context: defines shared resources visible to all other web components -->

	<!-- jdbc.properties 기반으로 bean 생성 -->
	<bean id="propertyPlaceholderConfigurer" class="org.springframework.beans.factory.config.PropertyPlaceholderConfigurer">
		<property name="locations">
			<value>/config/jdbc.properties</value>
		</property>
	</bean>

	<!-- 자바와 DB연동 -->
	<!-- ConnectionPool 사용하기(DB 입장시간 줄이기) -->
	<bean id="dataSource" class="org.apache.ibatis.datasource.pooled.PooledDataSource">
		<property name="driver"		value="${jdbc.driverClassName}"></property>
		<property name="url"		value="${jdbc.url}"></property>
		<property name="username"	value="${jdbc.username}"></property>
		<property name="password"	value="${jdbc.password}"></property>
	</bean>

	<!-- SqlSessionFactory는 DB와의 연결과 SQL의 실행에 대한 모든 것을 가진 객체 -->
	<bean id="SqlSessionFactory" class="org.mybatis.spring.SqlSessionFactoryBean">
		<property name="dataSource" ref="dataSource"></property>
		<!-- <property name="configLocation" value="classpath:/mybatis-config.xml"></property> -->
		<!-- ** 뜻 == 하위폴더가 몇 개든 간에 -->
		<property name="mapperLocations" value="classpath:mappers/**/*Mapper.xml"></property>
	</bean>

	<!-- SqlSession 객체 주입 -->
	<!-- DB연결 종료 후 잡다하게 종료해야 되는거 다 close해줌 -->
	<bean id="sqlSession" class="org.mybatis.spring.SqlSessionTemplate" destroy-method="clearCache">
		<constructor-arg name="sqlSessionFactory" ref="SqlSessionFactory"></constructor-arg>
	</bean>

</beans>
아래의 web.xml 파일의 param-value 값을 root-context2.xml로 바꾸면 연동 완료.

도서 쇼핑몰 만들기
1. view 제작
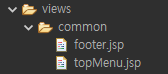
(1) 사용자가 보는 각 페이지마다 동일하게 계속 사용될 뷰(footer / topMenu) 제작.
<!-- footer.jsp -->

<%@ page language="java" contentType="text/html; charset=UTF-8" pageEncoding="UTF-8"%>

<div class="container text-center">
	<p>E-Mail : admin@testShop.com</p>
	<p>회사주소 : 서울특별시 종로구 관철동 좋은빌딩 305호</p>
	<p>찾아오시는 길 : <a href="#">약도</a></p>
</div>
<!-- topMenu.jsp -->

<%@	page language="java" contentType="text/html; charset=UTF-8" pageEncoding="UTF-8"%>
<%@	taglib prefix="c" uri="http://java.sun.com/jsp/jstl/core" %>
<c:set var="contextPath" value="${pageContext.request.contextPath}"/>
<%	request.setCharacterEncoding("UTF-8"); %>

<script src="https://ajax.googleapis.com/ajax/libs/jquery/3.6.0/jquery.min.js"></script>
<link rel="stylesheet" href="https://maxcdn.bootstrapcdn.com/bootstrap/3.3.2/css/bootstrap.min.css">
<link rel="stylesheet" href="https://maxcdn.bootstrapcdn.com/bootstrap/3.3.2/css/bootstrap-theme.min.css">
<script src="https://maxcdn.bootstrapcdn.com/bootstrap/3.3.2/js/bootstrap.min.js"></script>

<!--
	sticky-top은 상단 공간을 차지하면서 위에 고정하고,
	fixed-top은 상단 공간을 차지하지 않고 위에 고정된다.
	일부 내용이 상단 메뉴바에 가려져서 보이지 않을 수 있다.
-->
<nav class="navbar navbar-inverse navbar-sticky-top">
	<div class="container-fluid">
		<div class="navbar-header">
			<button type="button" class="navbar-toggle" data-toggle="collapse" data-target="#myNavbar">
				<span class="icon-bar"></span>
				<span class="icon-bar"></span>
				<span class="icon-bar"></span>
			</button>
			<a class="navbar-brand" href="${contextPath}/test/memberList">메인으로</a>
		</div>
		<!-- 실질적인 메뉴를 나열한다. -->
		<div class="collapse navbar-collapse" id="myNavbar">
			<ul class="nav navbar-nav navbar-right">
				<li>
					<form class="navbar-form navbar-right" method="post" action="${contextPath}/member/login.do">
						<c:choose>
							<c:when test="${isLogOn == true && member != null }">
								<p class="navbar-text"><strong>${member.name}</strong>님 안녕하세용~</p>
								<a href="${contextPath}/member/logout.do" class="btn btn-warning">
									<span class="glyphicon glyphicon-log-out"></span>로그아웃
								</a>
							</c:when>
							<c:otherwise>
								<div class="form-group">
									<input type="text" class="form-control" name="id" size="12" maxlength="12" placeholder="아이디"/>
									<input type="password" class="form-control" name="pw" size="12" maxlength="12" placeholder="비밀번호"/>
								</div>
								<button type="submit" class="btn btn-primary">
									<span class="glyphicon glyphicon-log-in"></span>로그인
								</button>
							</c:otherwise>
						</c:choose>
					</form>
				</li>
				<li class="dropdown">
					<a class="dropdown-toggle" data-toggle="dropdown" href="#">회원관리 <span class="caret"></span></a>
					<ul class="dropdown-menu">
						<li><a href="${contextPath }/member/loginForm.do">로그인</a></li>
					</ul>
				</li>
			</ul>
		</div>
	</div>
</nav>
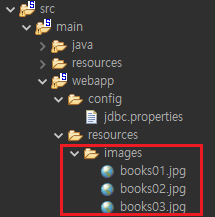
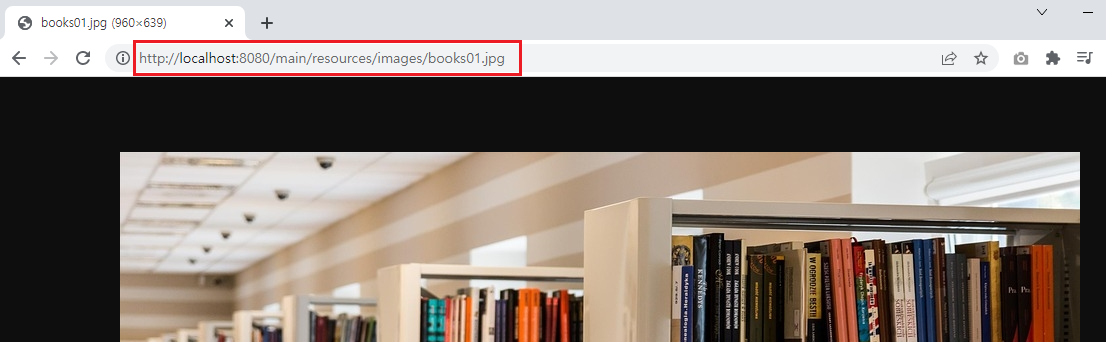
아래처럼 메인에서 사용할 정적 자원 (이미지파일)을 프로젝트에 넣는다.
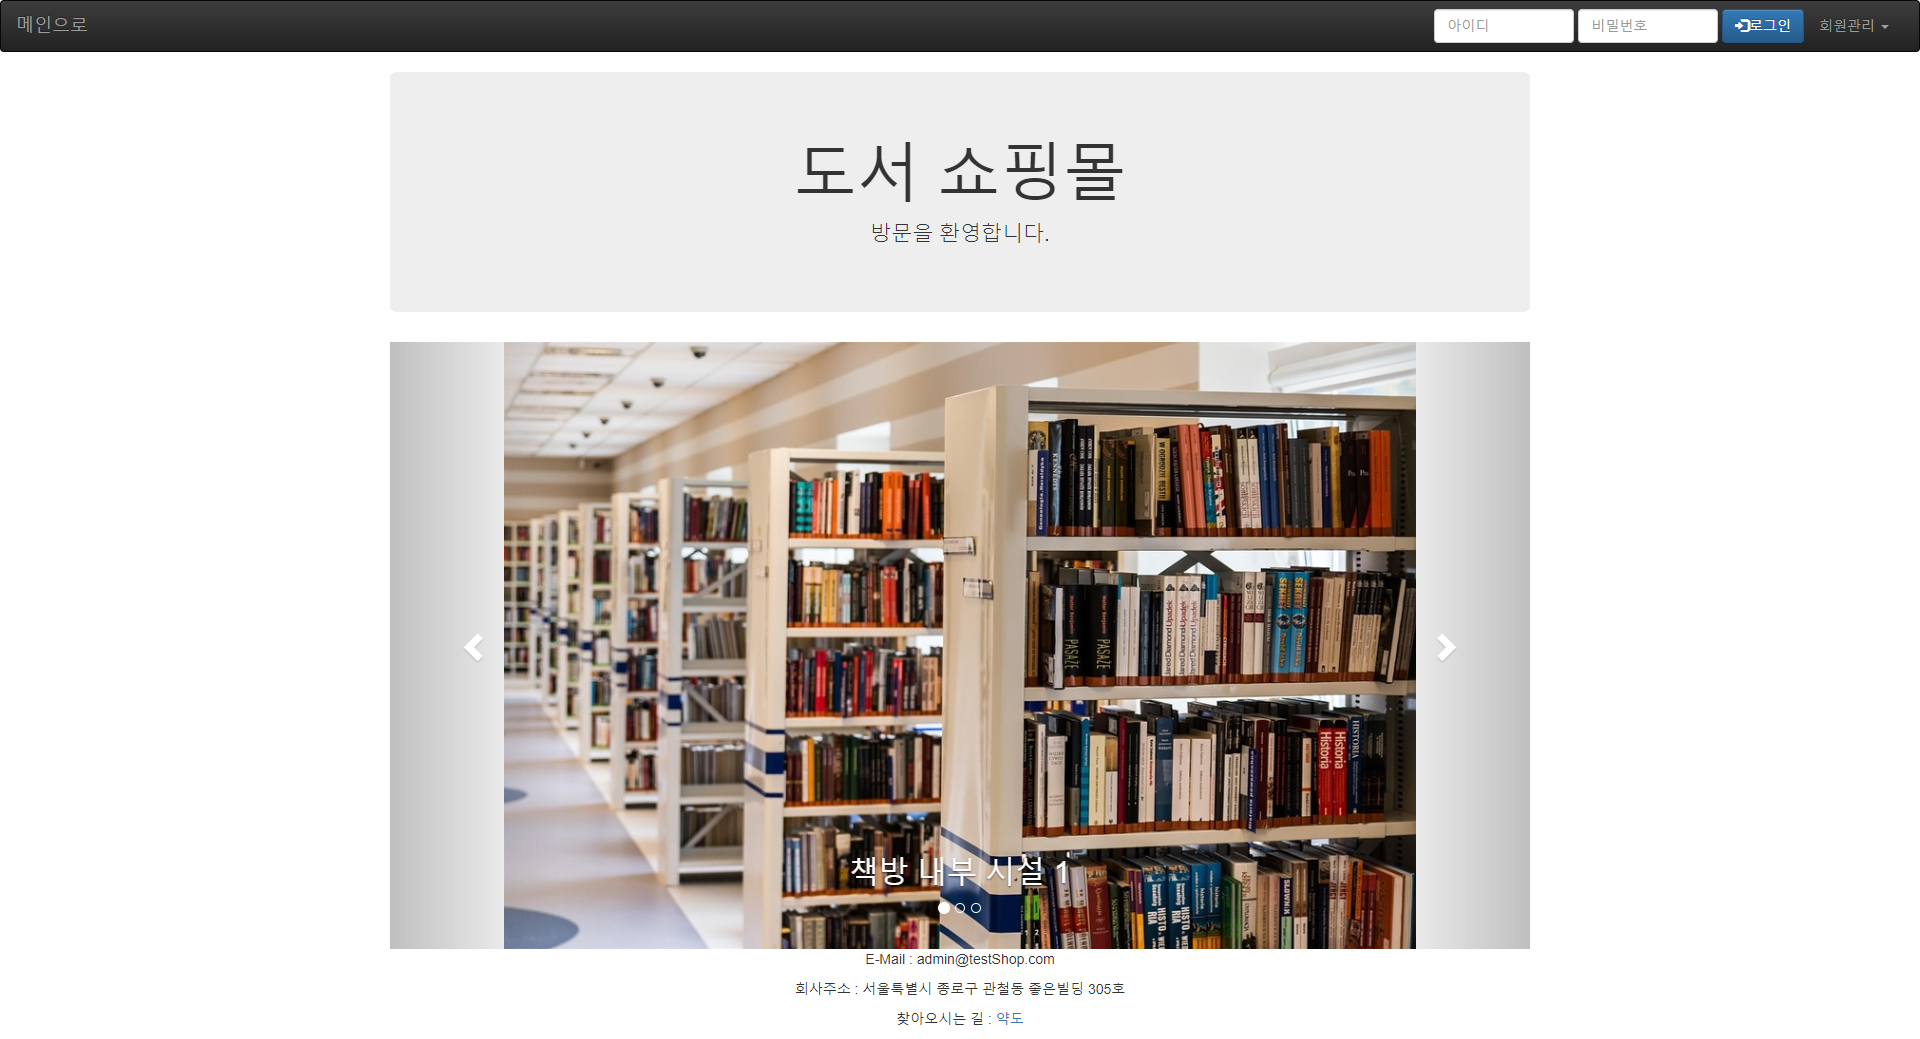
(2) 처음 보여지는 메인 뷰 제작
<!-- main.jsp -->
<%@ page language="java" contentType="text/html; charset=UTF-8" pageEncoding="UTF-8"%>
<%@ taglib prefix="c"	uri="http://java.sun.com/jsp/jstl/core" %>
<c:set var="contextPath" value="${pageContext.request.contextPath}"/>
<%  request.setCharacterEncoding("UTF-8"); %>

<!DOCTYPE html>
<html>
<head>
	<meta charset="UTF-8">
	<title>메인화면</title>
	<script src="https://ajax.googleapis.com/ajax/libs/jquery/3.6.0/jquery.min.js"></script>
	<link rel="stylesheet" href="https://maxcdn.bootstrapcdn.com/bootstrap/3.3.2/css/bootstrap.min.css">
	<link rel="stylesheet" href="https://maxcdn.bootstrapcdn.com/bootstrap/3.3.2/css/bootstrap-theme.min.css">
	<script src="https://maxcdn.bootstrapcdn.com/bootstrap/3.3.2/js/bootstrap.min.js"></script>
</head>
<body>

<!-- 메뉴바 -->
<jsp:include page="./common/topMenu.jsp" flush="false"/>

<!-- 메뉴바 하단에 페이지의 소개를 보여준다. -->
<div class="container">
	<div class="jumbotron">
		<div class="container text-center">
			<h1>도서 쇼핑몰</h1>
			<p>방문을 환영합니다.</p>
		</div>
	</div>
</div>

<!-- 화면 중앙에 이미지를 보여준다. -->
<div class="container">
	<div id="myCarousel" class="carousel slide" data-ride="carousel">
		<!-- Indicators -->
		<ol class="carousel-indicators">
			<li data-target="#myCarousel" data-slide-to="0" class="active"></li>
			<li data-target="#myCarousel" data-slide-to="1"></li>
			<li data-target="#myCarousel" data-slide-to="2"></li>
		</ol>

		<!-- Wrapper for slides -->
		<div class="carousel-inner">
			<div class="item active">
				<!-- class="img-responsive center-block" : 반응형 이미지를 가운데 정렬한다. -->
				<!-- <img class="img-responsive center-block" src="http://localhost:8080/main/resources/images/books01.jpg" width="80%" height="200px"/> -->
				<img class="img-responsive center-block" src="${contextPath}/resources/images/books01.jpg" width="80%" height="200px"/>
				<!-- carousel에 설명을 달아준다. -->
				<div class="carousel-caption">
					<h2>책방 내부 시설 1</h2>
				</div>
			</div>
			<div class="item">
				<!-- class="img-responsive center-block" : 반응형 이미지를 가운데 정렬한다. -->
				<img class="img-responsive center-block" src="${contextPath}/resources/images/books02.jpg" width="80%" height="200px"/>
				<!-- carousel에 설명을 달아준다. -->
				<div class="carousel-caption">
					<h2>책방 내부 시설 2</h2>
				</div>
			</div>
			<div class="item">
				<!-- class="img-responsive center-block" : 반응형 이미지를 가운데 정렬한다. -->
				<img class="img-responsive center-block" src="${contextPath}/resources/images/books03.jpg" width="80%" height="200px"/>
				<!-- carousel에 설명을 달아준다. -->
				<div class="carousel-caption">
					<h2>책방 내부 시설 3</h2>
				</div>
			</div>
		</div>

		<!-- 좌측, 우측으로 그림을 움직일 수 있도록 좌/우버튼을 설정한다. -->
		<a class="left  carousel-control" href="#myCarousel" data-slide="prev">
			<span class="glyphicon glyphicon-chevron-left"></span>
		</a>
		<a class="right carousel-control" href="#myCarousel" data-slide="next">
			<span class="glyphicon glyphicon-chevron-right"></span>
		</a>
	</div>
</div>

<!-- 푸터영역 -->
<jsp:include page="./common/footer.jsp" flush="false"/>

</body>
</html>
package com.edu.main;

import java.text.DateFormat;
import java.util.Date;
import java.util.Locale;

import org.slf4j.Logger;
import org.slf4j.LoggerFactory;
import org.springframework.stereotype.Controller;
import org.springframework.ui.Model;
import org.springframework.web.bind.annotation.RequestMapping;
import org.springframework.web.bind.annotation.RequestMethod;

/**
 * Handles requests for the application home page.
 */
@Controller	// 메모리에 올리는 대상
public class HomeController {

	private static final Logger logger = LoggerFactory.getLogger(HomeController.class);

	/**
	 * Simply selects the home view to render by returning its name.
	 */
	@RequestMapping(value = "/", method = RequestMethod.GET)	// url 주소와 request방식 설정
	public String home(Locale locale, Model model) {
		logger.info("Welcome home! The client locale is {}.", locale);

		Date date = new Date();
		DateFormat dateFormat = DateFormat.getDateTimeInstance(DateFormat.LONG, DateFormat.LONG, locale);

		String formattedDate = dateFormat.format(date);

		model.addAttribute("serverTime", formattedDate );

		// return "home";
		return "main";
	}

	@RequestMapping(value = "/sugoi", method = RequestMethod.GET)
	public String sugoi() {

		return "sugoi";
	}

}
프로젝트 내의 HomeController가 return 해주는 값을 main으로 바꾼다.
(주석처럼 home을 return하면 home.jsp 를 보여줌.)
프로젝트를 시작하면 main에 다음과 같은 뷰가 나타나게 된다.
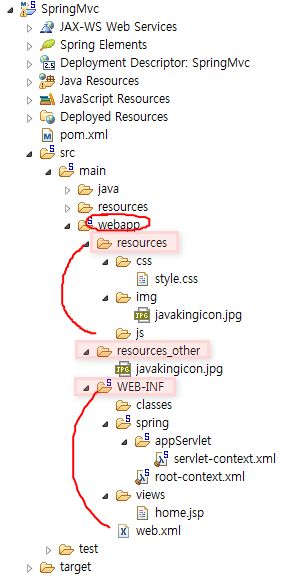
resources mapping
Spring에서 maven을 사용해서 웹 페이지 제작 작업 시에
기본적으로 정적 자원은 아래처럼 resources 폴더에 전부 들어간다.
뷰(View)에서 해당 resources 폴더가 아닌
다른 폴더를 만들어서 따로 파일을 넣어서 불러오고 싶을 시
servlet-context.xml 과 web.xml에 각각 설정 추가만 하면 쉽게 설정이 끝나는 데
이때 이 설정을 편하게 해주는 것이 resources mapping 이다.
<!-- web.xml -->

<?xml version="1.0" encoding="UTF-8"?>
<web-app version="2.5" xmlns="http://java.sun.com/xml/ns/javaee"
    xmlns:xsi="http://www.w3.org/2001/XMLSchema-instance"
    xsi:schemaLocation="http://java.sun.com/xml/ns/javaee
                        http://java.sun.com/xml/ns/javaee/web-app_2_5.xsd">

    <!-- The definition of the Root Spring Container shared by all Servlets and Filters -->
    <context-param>
        <param-name>contextConfigLocation</param-name>
        <param-value>/WEB-INF/spring/root-context.xml</param-value>
    </context-param>

    <!-- Creates the Spring Container shared by all Servlets and Filters -->
    <listener>
        <listener-class>org.springframework.web.context.ContextLoaderListener</listener-class>
    </listener>

    <!-- Processes application requests -->
    <servlet>
        <servlet-name>appServlet</servlet-name>
        <servlet-class>org.springframework.web.servlet.DispatcherServlet</servlet-class>
        <init-param>
            <param-name>contextConfigLocation</param-name>
            <param-value>/WEB-INF/spring/appServlet/servlet-context.xml</param-value>
            <!-- 여기에서 servlet-context.xml로 초기 설정을 위해 연결 -->
        </init-param>
        <load-on-startup>1</load-on-startup>
    </servlet>

    <servlet-mapping>
        <servlet-name>appServlet</servlet-name>
        <url-pattern>/</url-pattern>
        <!-- 모든 요청을 DispatcherServlet이 처리한다. -->
    </servlet-mapping>

</web-app>
servlet-context에 아래와 같은 구문을 추가하면 끝난다.
	<!-- Handles HTTP GET requests for /resources/** by efficiently serving up static resources in the ${webappRoot}/resources directory -->
	<!-- mapping = url창에 쓸때 경로, location = 실체 정적 자원 위치 -->
	<resources mapping="/resources/**" location="/resources/" />
<!-- servlet-context.xml -->
<beans xmlns="http://www.springframework.org/schema/beans"
xmlns:mvc="http://www.springframework.org/schema/mvc"
xmlns:context="http://www.springframework.org/schema/context"
xmlns:xsi="http://www.w3.org/2001/XMLSchema-instance"
xsi:schemaLocation="
http://www.springframework.org/schema/beans
http://www.springframework.org/schema/beans/spring-beans-3.0.xsd
http://www.springframework.org/schema/mvc
http://www.springframework.org/schema/mvc/spring-mvc-3.0.xsd
http://www.springframework.org/schema/context
http://www.springframework.org/schema/context/spring-context-3.0.xsd">
<!-- DispatcherServlet Context: defines this servlet's request-processing infrastructure -->
<!-- Enables the Spring MVC @Controller programming model -->
<mvc:annotation-driven />
<context:component-scan base-package="com.exam.springmvc" />
<!-- Resolves views selected for rendering by
@Controllers to .jsp resources in the /WEB-INF/views directory -->
<bean class="org.springframework.web.servlet.view.InternalResourceViewResolver">
<property name="prefix" value="/WEB-INF/views/" />
<property name="suffix" value=".jsp" />
</bean>
<!-- Handles HTTP GET requests for /resources/**
by efficiently serving up static resources in the ${webappRoot}/resources directory -->
<mvc:resources mapping="/resources/**" location="/resources/" />
<!--<mvc:resources mapping="/resources_other/**" location="/resources_other/" /> --><!--추가-->
</beans>
'코딩수업 > AWS 클라우드환경 네이티브' 카테고리의 다른 글
| 11/11 웹 제작 - 로그아웃 / 회원 가입 / 회원 리스트 목록 / 회원 정보 수정, 삭제 / Redirect 와 Forward (0) | 2022.11.24 |
|---|---|
| 11/10 웹 제작 - @Component와 @Bean / 도서 쇼핑몰 제작 (로그인) (0) | 2022.11.23 |
| (logger 미완)11/8 웹 제작 - RequestMapping / Inject / 로그 관리 (logger) (0) | 2022.11.18 |
| 11/7 웹 제작 - 롬북 / 모델 객체 / @RequestParam와 @ModelAttribute (2) | 2022.11.18 |
| 11/4 웹 제작 - xml에서 속성 추가, AutoWired, Controller (2) | 2022.11.17 |


댓글